- 액티비티-뷰
→ 화면을 출력하는 컴포넌트(안드로이드 앱 컴포넌트 중에 유일하다)
→ 대부분의 앱이 화면을 제공하지만 화면 없이 백그라운드에서만 실행하도록 개발할 수 있다.
→ 화면이 여러 개여도 액티비티 1개로 개발할 수 있다.(Fragment를 이용한다)
→ 뷰(View) 클래스를 이용하여 구성한다.
- 액티비티-뷰 클래스 종류
→ TextView 클래스
→ ImageView 클래스
→ LinearLayout 클래스
- 액티비티-뷰로 화면 구성하는 방법
→ 액티비티 코드
→ 레이아웃 XML 파일 작성
- 액티비티 코드로 화면 구성
import android.graphics.Typeface
import android.os.Bundle
import android.view.Gravity
import android.view.ViewGroup.LayoutParams.WRAP_CONTENT
import android.widget.LinearLayout
import android.widget.TextView
import androidx.appcompat.app.AppCompatActivity

class MainActivity : AppCompatActivity() {
    override fun onCreate(savedInstanceState: Bundle?) {
        super.onCreate(savedInstanceState)

        //이름 문자열 출력 TextView 생성
        val name = TextView(this).apply {
            typeface = Typeface.DEFAULT_BOLD
            text = "Lake Louise"
        }

          val image = ImageView(this).also {
              it.setImageDrawable(ContextCompat.getDrawable(this, R.drawable.lake_1))
          }

        val address = TextView(this).apply{
            typeface = Typeface.DEFAULT_BOLD
            text = "Lake Louise, AB, 캐나다"
        }

        val layout = LinearLayout(this).apply{
            orientation = LinearLayout.VERTICAL
            gravity = Gravity.CENTER

            addView(name,WRAP_CONTENT,WRAP_CONTENT)
            //addView(image,WRAP_CONTENT,WRAP_CONTENT)
            addView(address,WRAP_CONTENT,WRAP_CONTENT)
        }

        setContentView(R.layout.activity_main)
    }

}
→ 책에 있는 코드를 그대로 입력했지만 ContextCompat.getDrawable(this, R.drawable.lake_1)이 부분에서 오류가 나온다. 이미지 파일이 없어서 오류가 발생하는 것 같은데 이미지를 어떻게 코드에 가져다 써야 할지를 몰라서 뒷부분을 공부하고 오류를 수정해야 할 것 같다.
→ apply {}
apply 함수를 호출하는 구문이다.
원래 함수 호출 문은 apply()처럼 소괄호를 써야 하는데 호출하려는 함수가 고차 함수이고 마지막 전달 인자가 람다 함수이면 소괄호를 생략해도 된다.
some({println("hello")} //원래 함수식
some{println("hello")} //생략된 함수
- 레이아웃 XML로 화면 구성
XML 파일로 구현되어 있는 경우 액티비티 코트에 내용을 작성하지 않아도 되지만, 코드에서 화면을 구현한 XML을 명시해 어떤 화면을 출력할지 알려 줘야 한다.
화면을 출력하는 setContentView() 함수만 호출하면서 XML 파일을 전달하면 된다.
- 뷰 클래스
안드로이드에서 화면을 만들어 표시하는 컴포넌트는 액티비티이고 액티비티가 실행되면서 뷰 클래스를 이용해 화면을 구성한다. 안드로이드는 TextView, ImageView, EditText, Button, Spinner, ListView 등 많은 뷰 클래스를 제공한다.
- 뷰 객체의 계층 구조
화면을 구성할 때 사용하는 모든 클래스는 View의 하위 클래스이다.
| View | 모든 뷰 클래스의 최상위 클래스이다. 액티비티는 View의 서브 클래스만 화면에 출력한다. |
| ViewGroup | View의 하위 클래스지만 자체UI는 없어서 화면에 출력해도 아무것도 나오지 않는다. 다른뷰 여러개를 묶어서 제어할 목적으로 사용한다. 컨테이너 기능을 담당한다 |
| TextView | 특정 UI를 출력할 목적으로 사용하는 클래스,문자열을 출력하는 뷰이다. |
| Layout | 객체의 계층 구조에서 중요한 역할을 한다. ViewGroup 클래스의 하위 클래스 다른 객체 여러개를 담아서 한꺼번에 제어할 목적으로 사용 |
□ 레이아웃 클래스에 뷰 포함
<LinearLayout xmlns:android="http://schemas.android.com/apk/res/android"
    xmlns:app="http://schemas.android.com/apk/res-auto"
    xmlns:tools="http://schemas.android.com/tools"
    android:layout_width="match_parent"
    android:layout_height="match_parent"
    tools:context=".MainActivity">

    <Button
        android:layout_width="wrap_content"
        android:layout_height="wrap_content"
        android:text="BUTTON1"/>
    <Button
        android:layout_width="wrap_content"
        android:layout_height="wrap_content"
        android:text="BUTTON2"/>
</LinearLayout>
→ 레이아웃 클래스에 뷰 객체를 계층으로 묶어서 출력시켰다.
- 레이아웃 중첩
뷰의 계층 구조는 레이아웃 객체를 중첩해서 복잡하게 구성할 수 있다.
□ 레이아웃 중첩 예시
<?xml version="1.0" encoding="utf-8"?>
<LinearLayout xmlns:android="http://schemas.android.com/apk/res/android"
    android:layout_width="match_parent"
    android:layout_height="match_parent"
    android:orientation="vertical">

    <Button
        android:layout_width="wrap_content"
        android:layout_height="wrap_content"
        android:text="BUTTON1" />

    <Button
        android:layout_width="wrap_content"
        android:layout_height="wrap_content"
        android:text="BUTTON2" />

    <LinearLayout
        android:layout_width="match_parent"
        android:layout_height="wrap_content"
        android:orientation="horizontal">

        <Button
            android:layout_width="wrap_content"
            android:layout_height="wrap_content"
            android:text="BUTTON3" />

        <Button
            android:layout_width="wrap_content"
            android:layout_height="wrap_content"
            android:text="BUTTON4" />
    </LinearLayout>
</LinearLayout>
→ 레이아웃을 2개 중첩시킨 모습이다.
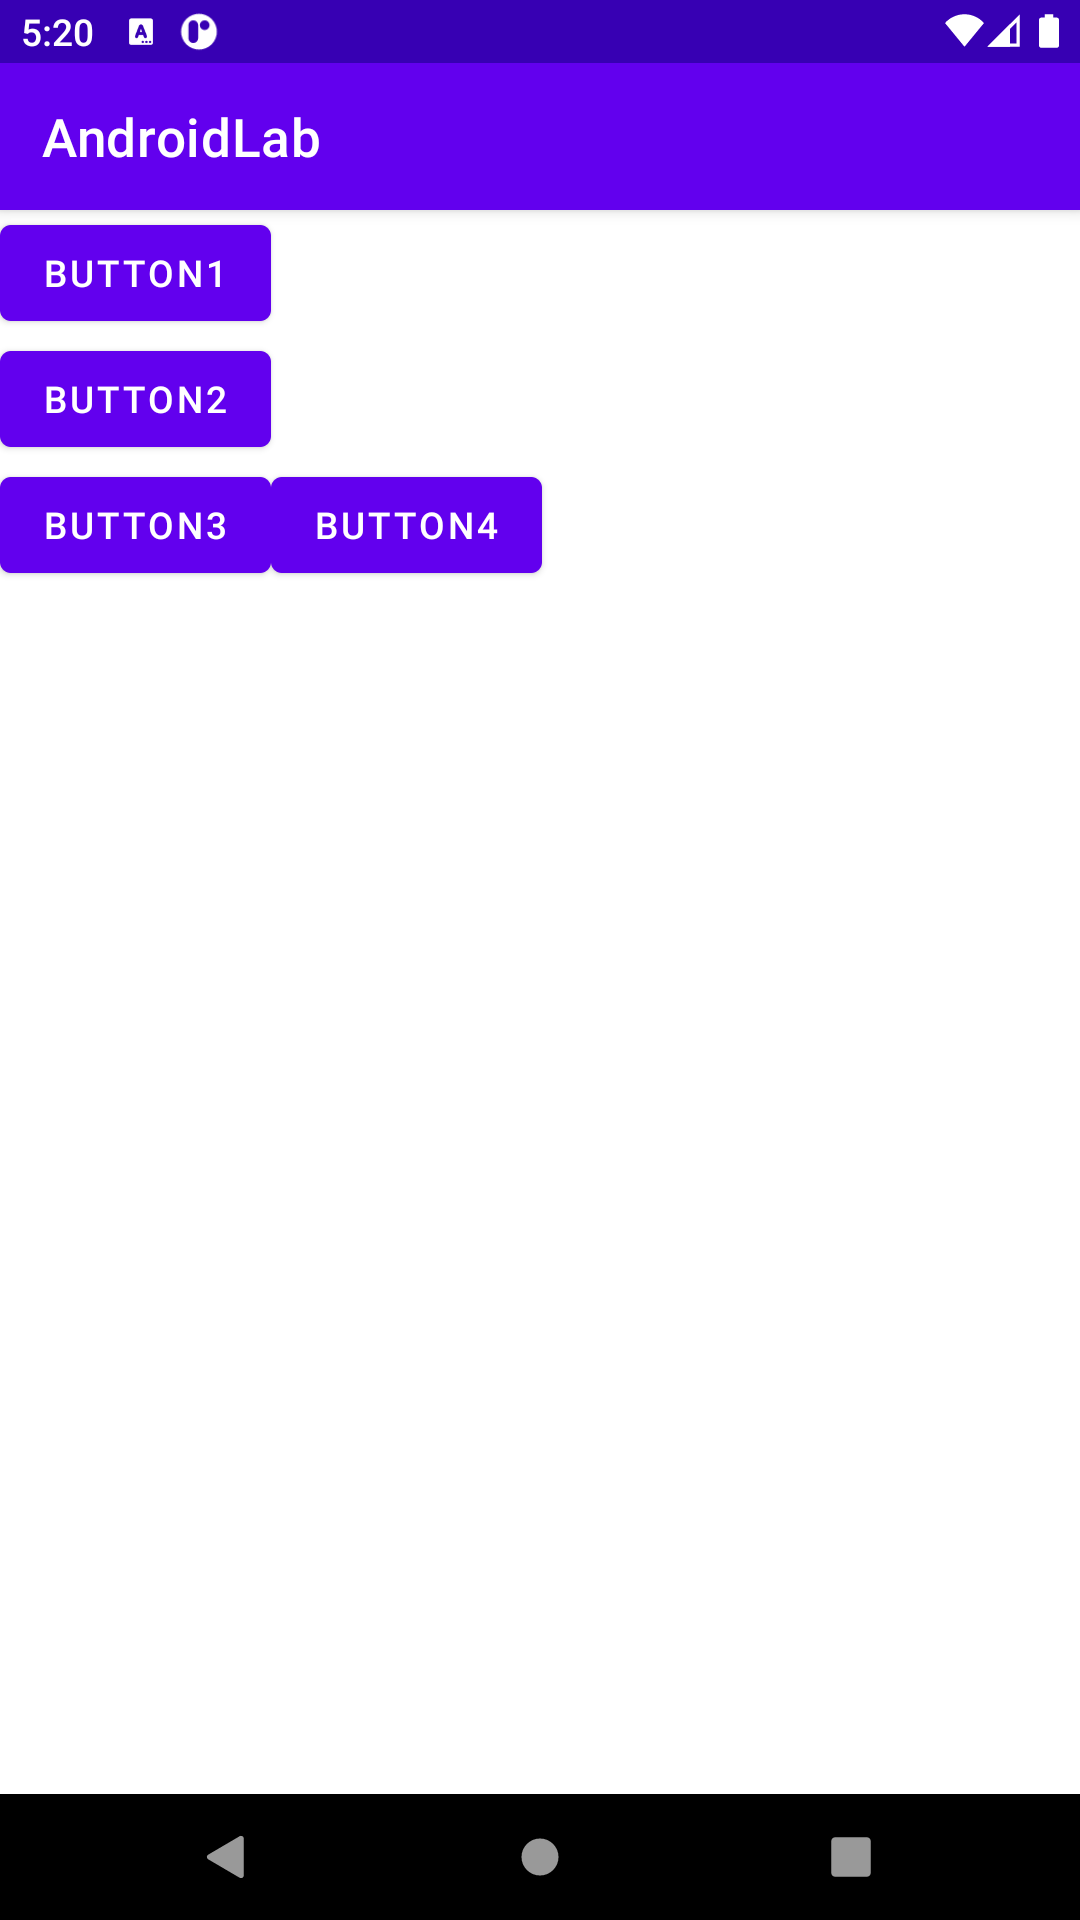
→ 위 코드처럼 객체를 계층 구조로 만들어 이용하는 패턴을 컴포지트 패턴(composite pattern) 또는 문서 객체 모델(document object model)이라고 한다.
- 레이아웃 XML의 뷰를 코드에서 사용
XML에 선언한 객체를 코드에서 사용할 때 각 객체를 어떻게 부를 것인지 식별자를 부여하고 그 식별자로 객체를 얻어 오기 위해 id를 사용한다.
□ id속성 부여
<TextView
android:id= "@+id/text1"
android:layout_width= "wrap_content"
android:layout_height= "wrap_content"
android:text= "hello" />
android:id= "@+id/text1" 이러한 형태로 id속성을 추가한다.(text1이 id값)
@로 시작하면 R.java파일을 의미
id값은 식별자로 이용할 것이므로 앱에서 유일해야 한다.
XML에 id속성을 추가하면 자동으로 R.java파일에 상수 변수로 추가된다
□ 코드에서 XML에 입력한 객체 사용법
setContentView(R.layout.activity_main)	//뷰 객체 생성

val textView1: TextView= fineViewById(R.id.text1)

val textView1: findViewById<TextView>(R.id.text1) //제네릭 타입
생성된 뷰 객체를 fineViewById(R.id.text1)을 이용하여 가져온다.
- 뷰 크기 지정 방법
layout_width, layout_height로 뷰의 크기를 설정한다.
크기를 나타내는 속성 값
→ 수치 : 가로세로 크기를 100px처럼 지정할 수 있다.(단위 생략 불가)
→ match_parent : 부모의 크기 전체(상위 계층의 크기)
→ wrap_content : 자신의 콘텐츠를 화면에 출력할 수 있는 적절한 크기
- 뷰의 간격 설정
margin : 뷰와 뷰 사이의 간격
padding : 뷰의 콘텐츠와 테두리 사이의 간격
특정 방향의 간격만 설정
→ paddingLeft, paddingRight, paddingTop, paddingBottom, layout_marginLeft, layout_marginRight, layout_marginRight, layout_marginTop, layout_marginBottom 속성을 이용한다.
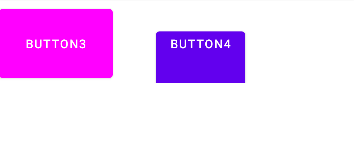
□ 뷰의 간격 설정
<LinearLayout
    android:layout_width="match_parent"
    android:layout_height="wrap_content"
    android:orientation="horizontal">

    <Button
        android:layout_width="wrap_content"
        android:layout_height="wrap_content"
        android:text="BUTTON3"
        android:backgroundTint="#ff00ff"
        android:padding="30dp"/>

    <Button
        android:layout_width="wrap_content"
        android:layout_height="wrap_content"
        android:text="BUTTON4"
        android:paddingBottom="50dp"
        android:layout_marginLeft="50dp"/>
</LinearLayout>
- 뷰의 표시 여부 설정
visibility속성은 뷰가 화면에 출력되어야 하는지를 설정
visible : 기본값으로 설정되고 뷰를 화면에 출력
invisible : 뷰가 화면에 보이지 않게 한다, 화면에 자리 차지한다.
gone : 뷰가 화면에 보이지 않게 한다, 화면에 자리를 차지하지 않는다
□ 코드 적용 예제
android:visibility= "invisible"invisible, gone을 설정하는 이유는 처음에는 화면에 보이지 않다가 어떤 순간이 되면 보이게 처리하기 위해 사용한다.
XML이 아닌 코드에서 뷰의 visibility 속성을 조정하려면 뷰의 visibility 속성 값을 View.VISIBLE이나 View.INVISIBLE로 설정하면 된다.
코틀린에서 변수는 자바와 다르게 필드(field)가 아니라 프로퍼티(property)이다.
변수에 세터(setter)와 게터(getter)가 내장되어 있다.
- 기본적인 뷰
- 텍스트 뷰
TextView는 문자열을 화면에 출력하는 뷰이다.
→ android:text 속성
TextView에 출력할 문자열을 지정한다.
android:text="helloworld"	//문자열 대입

android:text="@string/hello"	//문자열 리소스 지정
→ android:textColor 속성
문자열의 색상을 지정
android:textColor="#FF0000"16진수 RGB형식을 사용한다.
→ android:textSize 속성
문자열의 크기를 지정
android:textSize="20sp"값은 숫자를 사용하고 단위(px, dp, sp 등을 사용)는 생략할 수 없다.
→ android:textStyle 속성
문자열의 스타일을 지정
android:textStyle="bold"bold, italic, normal 중에서 선택한다.
→ android:autoLink 속성
TextView에 출력할 문자열을 분석해 특정 형태의 문자열에 자동 링크를 추가한다.
android:autoLink="web"위 코드처럼 설정하면 문자열에 웹 주소가 포함됐을 때 해당 문자열을 링크 모양으로 표시한다. 사용자가 해당 링크를 클릭했을 때 웹 브라우저를 실행한다.
autoLink 속성 값으로는 web, phone, email 등을 사용할 수 있으며 여러 개를 설정하려면 |기호를 연결한다.
android:autoLink="web|email|phone"
→ android:maxLines 속성
TextView에 문자열을 출력할 때 긴 문자열은 자동으로 줄 바꿈 한다.
android:maxLines="3"위 코드처럼 설정하면 문자열이 3행까지만 출력한다.
android:ellipsize 속성
maxLines속성을 이용할 때 출력되지 않는 문자열이 더 있다는 것을 표시하려면 줄임표(...)를 넣는다.
ellipsize 속성을 end, middle, start 등을 설정한다.
| end | 문자열 뒤에 줄임표가 추가된다 |
| middle | 문자열 중간에 추가된다.(singleLine="true" 속성으로 문자열을 한줄로 출력했을 때 적용) |
| start | 문자열 앞에 추가된다.(singleLine="true" 속성으로 문자열을 한줄로 출력했을 때 적용) |
- 이미지 뷰
ImageView는 이미지를 화면에 출력하는 뷰
→ android:src 속성
리소스, 파일 이미지, 네트워크 이미지 등을 출력할 수 있다.
android:src="@drawable/image3"이처럼 리소스 이미지를 설정하면 된다.
→ android:maxWidth, android:maxHeight, android:adjustViewBounds 속성
ImageView가 출력하는 이미지의 최대 크기를 지정
뷰의 크기는 layout_width, layout_height 속성으로 설정하지만 속성의 크기가 고정되어 있어서 뷰에 넣을 이미지 크기가 다양하다면 이미지와 뷰의 크기가 맞지 않는 경우가 생길 수 있다.
maxWidth, maxHeight는 android:adjustViewBounds 속성에 함께 사용해야 하며, 이 속성을 true로 설정하면 이미지의 가로세로 길이와 비례해 뷰의 크기를 맞춘다.
정확한 이미지 크기를 맞추기 위해 사용한다.
□ 예시
android:maxWidth="100dp"
android:maxHeight="100dp"
android:adjustViewBounds="true"
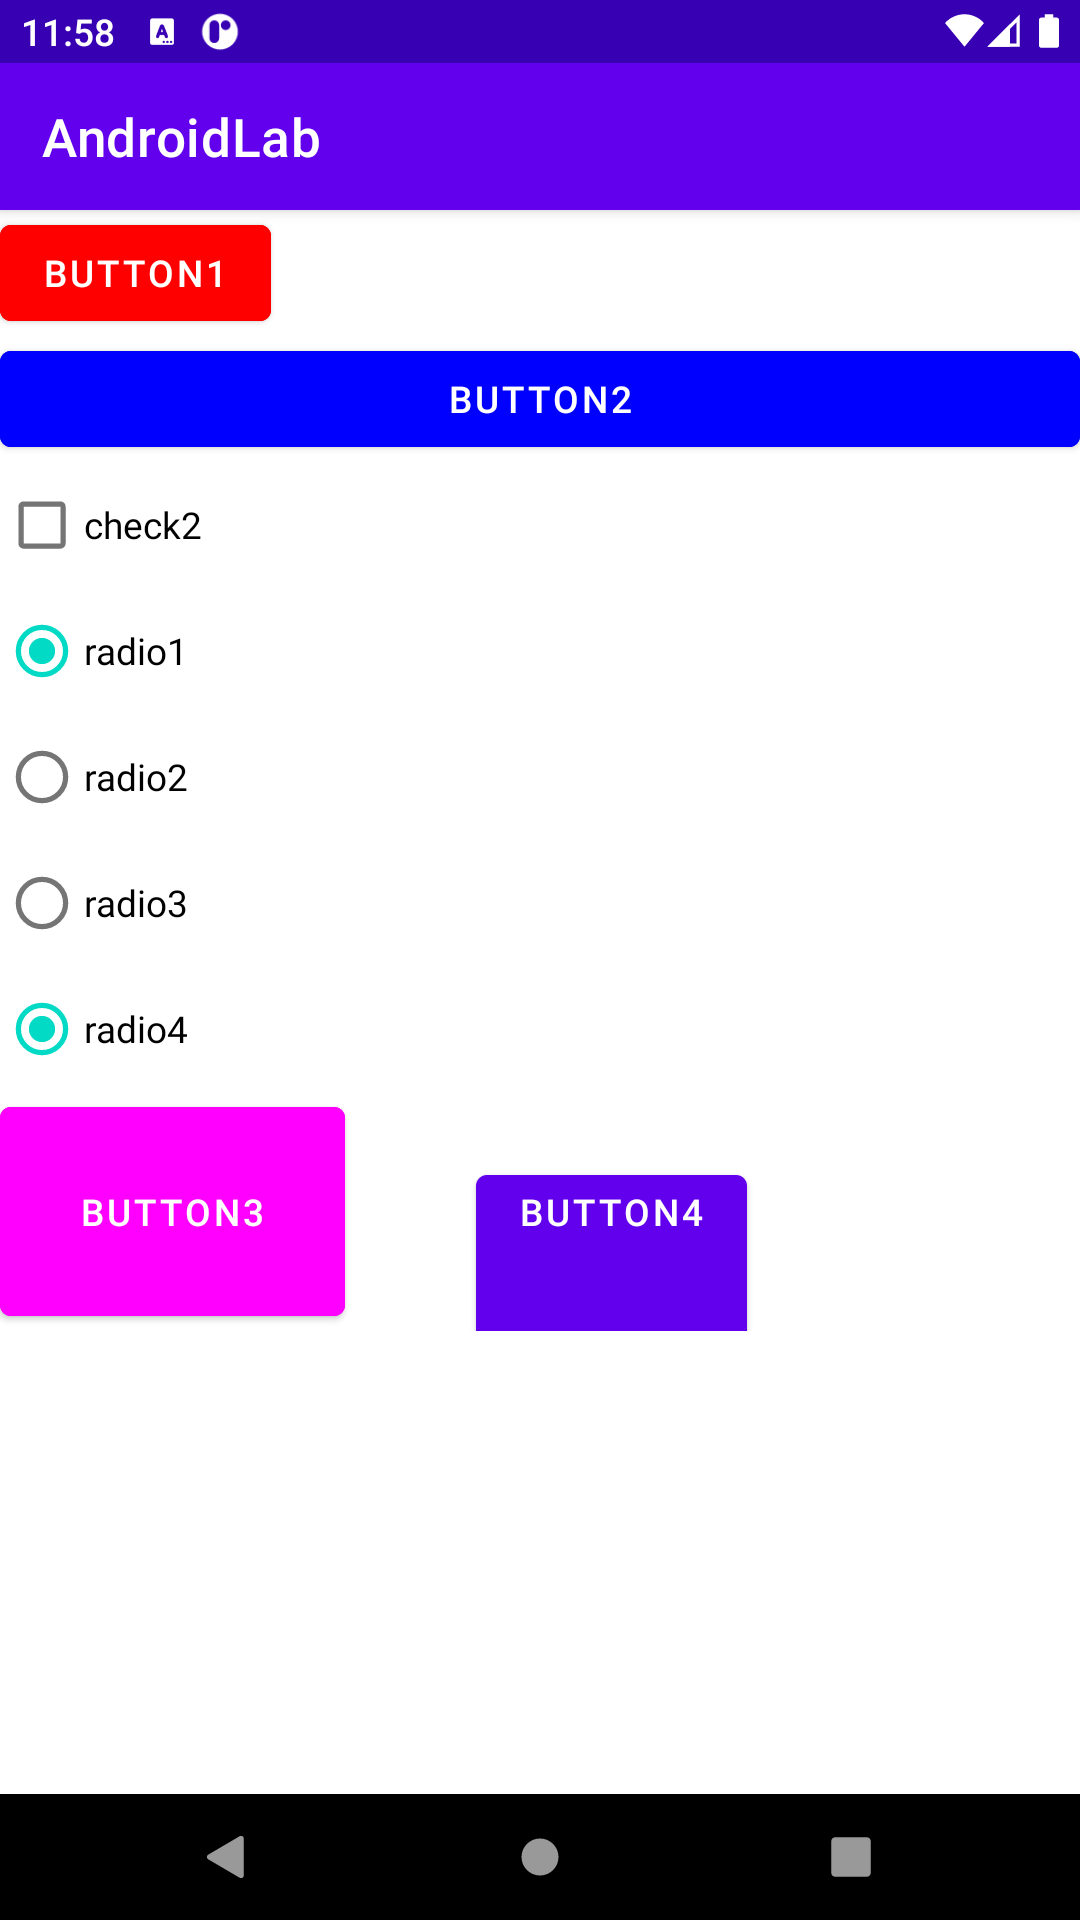
- 버튼, 체크박스, 라디오 버튼
Button : 사용자 이벤트 처리
CheckBox : 다중 선택
RadioButton : 단일 선택 (RadioGroup과 함께 사용)
□ 버튼, 체크박스, 라디오 버튼 사용
<?xml version="1.0" encoding="utf-8"?>
<LinearLayout xmlns:android="http://schemas.android.com/apk/res/android"
    android:layout_width="match_parent"
    android:layout_height="match_parent"
    android:orientation="vertical">

    <Button
        android:layout_width="wrap_content"
        android:layout_height="wrap_content"
        android:text="BUTTON1"
        android:backgroundTint="#ff0000"/>

    <Button
        android:layout_width="match_parent"
        android:layout_height="wrap_content"
        android:text="BUTTON2"
        android:backgroundTint="#0000ff"/>

    <CheckBox
        android:layout_width="wrap_content"
        android:layout_height="wrap_content"
        android:text="check2"/>
    <RadioGroup
        android:layout_width="wrap_content"
        android:layout_height="wrap_content">
        <RadioButton
            android:layout_width="wrap_content"
            android:layout_height="wrap_content"
            android:text="radio1"/>
        <RadioButton
            android:layout_width="wrap_content"
            android:layout_height="wrap_content"
            android:text="radio2"/>

    </RadioGroup>

    <RadioGroup
        android:layout_width="wrap_content"
        android:layout_height="wrap_content">
        <RadioButton
            android:layout_width="wrap_content"
            android:layout_height="wrap_content"
            android:text="radio3"/>
        <RadioButton
            android:layout_width="wrap_content"
            android:layout_height="wrap_content"
            android:text="radio4"/>

    </RadioGroup>

    <LinearLayout
        android:layout_width="match_parent"
        android:layout_height="wrap_content"
        android:orientation="horizontal">

        <Button
            android:layout_width="wrap_content"
            android:layout_height="wrap_content"
            android:text="BUTTON3"
            android:backgroundTint="#ff00ff"
            android:padding="30dp"/>

        <Button
            android:layout_width="wrap_content"
            android:layout_height="wrap_content"
            android:text="BUTTON4"
            android:paddingBottom="50dp"
            android:layout_marginLeft="50dp"/>
    </LinearLayout>
</LinearLayout>
- 에디트 텍스트
EditText는 사용자가 글을 입력할 수 있는 뷰
→ android:lines, android:maxLines 속성
EditText는 한 줄 입력 크기로 출력되다가 사용자가 키보드에서 엔터를 누르면 아래로 늘어나서 여러 줄 입력 크기가 된다.
android:lines="3"은 3줄 입력 크기로 화면에 나오며 더는 늘어나지 않는다.
android:maxlines="3"으로 지정하면 처음에는 한줄 입력 크기로 출력되다가 사용자가 키보드에서 엔터를 누르면 최대 3줄까지 늘어난다.
→ android:inputType 속성
inputType은 EditText에 글을 입력할 때 올라오는 키보드를 지정하는 속성
inputType을 설정하지 않으면 기본인 문자 입력 모드로 키보드가 올라오며 여러 줄을 입력할 수 있다.
android:inputType="phone"으로 설정하면 전화번호 입력 모드로 올라오며 한 줄 입력으로 강제된다.
□ inputType 속성값
| 속성값 | 설명 |
| none | 입력 유형을 지정하지 않은 상태. 모든 문자 입력 가능, 줄바꿈가능 |
| text | 문자열 한 줄 입력 |
| textCapCharacters | 대문자 입력 모드 |
| textCapWords | 각 단어의 첫 글자 입력 시 키보드가 자동으로 대문자 입력 모드 |
| textCapSentences | 각 문단의 첫 글자 입력 시 키보드가 자동으로 대문자 입력 모드 |
| textMultiLines | 여러 줄 입력 가능 |
| textNoSuggestions | 단어 입력시 키보드의 추천 단어를 보여 주지 않음 |
| textUri | URL 입력 모드 |
| textEmailAddress | 이메일 주소 입력 모드 |
| textPassword | 비밀번호 입력 모드, 입력문자를 점으로 표시, 키보드는 영문자와 숫자 그리고 특수 키만 표시 |
| textVisiblePassword | textPassword와 같으며 입력한 문자 표시 |
| number | 숫자 입력 모드 |
| numberSigned | number와 같으며 부호 키인 마이너스(-) 입력 가능 |
| numberDecimal | number와 같으며 소숫점 입력 가능 |
| numberPassword | 숫자 키만 입력 가능, 입력한 문자는 점으로 표시 |
| phone | 전화번호 입력 모드 |
8일차 공부 끝!
'KOTLIN' 카테고리의 다른 글
| [Kotlin] 공부 10일차 (2022-01-24) (0) | 2022.01.24 |
|---|---|
| [Kotlin] 공부 9일차 (2022-01-23) (0) | 2022.01.24 |
| [Kotlin] 공부 7일차 (2022-01-19) (0) | 2022.01.19 |
| [Kotlin] 공부 6일차 (2022-01-18) (0) | 2022.01.18 |
| [Kotlin] 공부 5일차 (2022-01-17) (0) | 2022.01.18 |